 Point, Click, Map
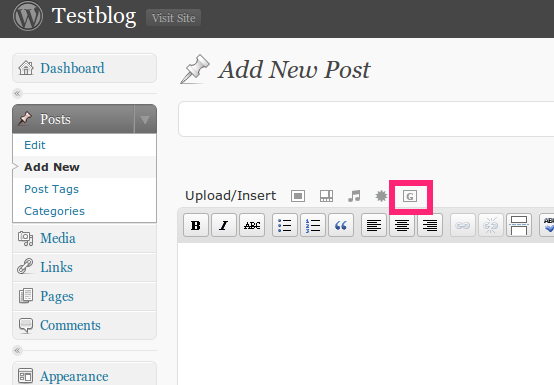
After the plugin is installed, your can build Google Maps and display them in your WordPress posts just by popping open the “edit Post” window like normal. There will be a new item in the Media Upload row at the top of your post (a “G” inside a grey box). The new button is pictured below circled in red.

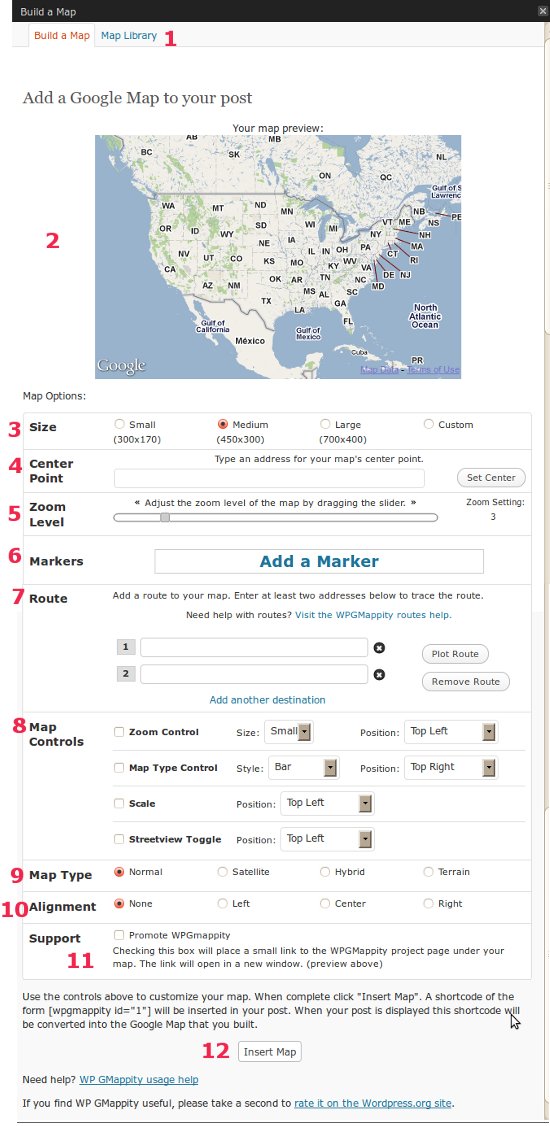
After clicking the button you will be presented with the WPGMappity interface. The image below is a screen capture of interface used to build a map. The red numbers in the image line up with the descriptions of functionality below.
Summary of WPGMappity functionality:

- The two tabs at the top of the interface are links. The “Map Library” link leads to a listing of all maps that are stored in your database. Click here to edit or delete an old map
- This is a preview of the map that you are building. Any changes that you make in your configuration will be displayed in this preview. Note: moving the map around by clicking and dragging in this window does not effect what will be displayed when you save your map. Instead use the “Center Point” option below to choose what your map should contain.
- Size: Select the size of your map. Much like choosing the size of an image in WordPress, you can choose from predefined selections of small, medium, and large or pick a custom size. Make sure the size you choose will fit comfortably in your blog’s template.
- Center Point: Enter an address that will be the center of your map. After you have entered an address the plugin will ask Google Maps to geolocate the position. If Google can’t find an exact match you will be offered choices that best fit the address you entered. Click any of those to choose them. The functionality in this section is much like entering an address or location on Google Maps.
- Zoom Level: Adjust the zoom level by dragging the slider right to left. Levels go from 1 – 20. 1= Zoomed all the way out, 20 = zoomed all the way in.
- Add Marker: To add a marker to a point on your map click “Add Marker.” You will be asked to enter an address and if it is found by Google Maps it will be added to your map. If not you will be presented with a choice of more addresses just as in “Center Point.”
Configure / Delete Markers: For each marker you have added you can delete it by selecting “Remove” or you can add a pop up window that will display text when a viewer clicks your marker. To make the text displayed function as a link, check the box and enter a URL. - Routes: The routes feature allows you to plot a route between two points. The Google Maps directions API will attempt to plot the locations you have entered and draw a polyline between them. WPGMappity will automatically adjust both the center point and the zoom level of your map when yo submit a route.
- Map Controls: This section allows you to place, remove and customize the standard Google Maps controls onto your map.
- Map Type: Choose the type of map that you would like to display: normal, satellite, terrain, or a hybrid.
- Alignment: Just like adding an image to your post you can have the map float left or right, be centered, or have no alignment specified.
- Support: Selecting the check box will place a small link to the WPGMappity project page under your map. Of course this is by no means required, but if you don’t mind how it looks we would really appreciate the link exposure!
- Insert Map: When you have your map just how you like it hit “Insert Map.” This will save off you map info to the database and insert a WordPress “shortcode” into your post. Wherever that shortcode is, the map will be displayed when you view your post.
Edit or Delete Existing Maps:
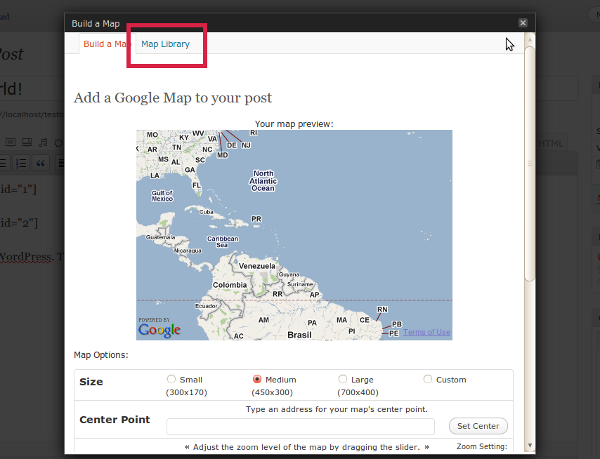
All of your maps are stored in the blog’s database. In later versions of this plugin you can access all your stored maps by selecting “Map Library” on the WPGMappity screen. The link is highlighted in red in the image below:

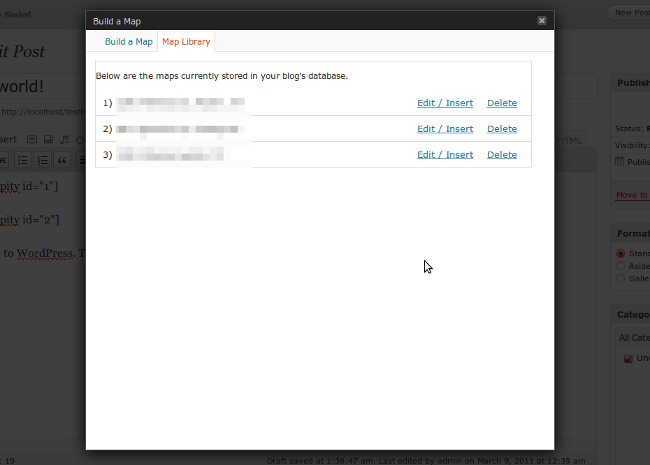
From the next screen you can choose to insert or delete the map. If you choose to “Insert / Edit” you will be taken back to the Map Edit screen to continue editing of your map. You can add the map to your post by selecting “Insert Map” at the bottom of the screen as normal.

Read more about WPGMappity:
- WPGMappity Overview
- WPGMappity Installation
- For support and discussion there is a public Google Group
Leave a Reply